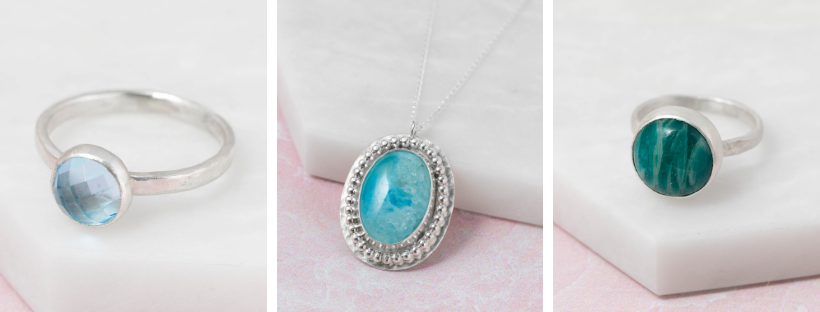
Stone Setting in Silver
Hello lovely
If you love gemstones then you are in the right place!
stone setting in silver
Is designed for beginner jewellers ready to set gemstones
Learn THREE different styles of gemstone setting
Flush setting, also known as gypsy setting, is where faceted stones are set ‘flush’ or level with the surface of the metal.
3. tube setting
Tube setting is another way to set faceted stones. You will learn how to burr out a seat in a tube and set the stone inside.
What will I learn?
How to shape and size a bezel for a cabochon stone
How to make a bezel set ring
How to set a cabochon stone
How to cut a tube setting to size
How to create a seat and set the faceted stone in a tube setting
How to make a ring with a tube setting
How to set a faceted stone into a tube
How to make a tube set pendant design
How to flush set faceted stones
How to polish and finish your stone set pieces
And lots more tips and tricks.
Who will you learn from? Well,
meet your tutor, hayley kruger
Hayley Kruger is a jewellery designer and jewellery industry professional who has worked in many aspects of the trade since 2002. With a BA Honours in Jewellery & Silversmithing, Hayley went onto work as a designer for many of the UK's most recognisable retailers such as Top Shop, Marks & Spencer, River Island, Next, Lola Rose, Orelia, Morgan and many more.
She taught for many years at the London Jewellery School and has been a mentor for the Jewellers Academy Diploma courses since the beginning, currently mentoring on the Advanced Jewellery Diploma.
Hayley was invited to show her work at the Victoria and Albert Museum, has been published in Vogue, Stylist and Marie Claire to name a few. And she was invited to be an ambassador for Triumph Lingerie's Women in Making campaigns 2013 and 2014.
Using the experience she gained, Hayley now works from her studio in Cirencester on private commissions including engagement rings and shares her knowledge on various aspects of the jewellery industry.
Who better to learn from than an experienced goldsmith?
What do I get?
When you enrol on this course you get:
Ongoing access to comprehensive video lessons, guiding you through all the techniques, tips and tricks
Downloadable course notes to work alongside the videos
Full list of kit and materials to learn the techniques (you can find that below if you want to check before you join the course)
Access to our supportive community of jewellers and tutors to help you at every stage of the process
Access to the videos 24/7 - you can stop, pause, rewind and replay as much as you like
Excellent close-up shots to see what is happening in each step so you don't miss a thing
Ready to enrol? This course is just £119 for lifetime access, click the button below to enrol and get started straight away!
Questions?
What level of jeweller is this course designed for?
This course is designed for beginners who have done some jewellery making before. We recommend that you have made some basic jewelllery projects before and done some sawing, filing and soldering. This free beginners course is a great start https://learn.jewellersacademy.com/p/silver-jewellery-making-for-absolute-beginners-free-course
What tools do I need?
Jewellers toolkit - Saw and saw blades, Bench peg, Large hand file, Half round needle file, Needle files, Flat file, Sharpie, Centre punch and hammer, Steel block, Tin snips, D Shape pliers, Callipers
Soldering equipment- soldering block, torch, flux, tweezers, pickle, third hand
Rubber burr - tapered/bullet shape, fine grit
Ring mandrel and rawhide mallet
Polishing materials (Scotchbrite mop and pendant motor used in the video), Emery paper (400-600 grit)
Optional - tube cutter
Stone Setting Tools
Drill bit - 1mm
Lubricant - beeswax, oil or burr life
Beeswax or pick up stick
Pin vice or dremel/pendant motor
Safety goggles
Flush setting tool - created from an old nail or broken burr
Curved burnisher
Ring clamp
Pendant motor, Dremel or a pin vice
Setting burr (pointed end) or ball burr - 5mm (this needs to match the size of your stone)
2mm round/ball burr or stone setting burr (pointed end)
Lubricant - beeswax, oil or Burr Life
Square pusher
Optional - bezel rocker
Optional - optivisors/magnification
what materials do I need?
These are the materials used to make the projects in the online course. We recommend watching the course through to choose which project to start with.
Flush Setting
2mm thick silver sheet, 20mm x 10mm
2mm round faceted stone
Jump ring
Hard silver solder
Tube Setting
Silver Tube, Outside Diameter 5.5mm, Inside Diameter 4.2mm, 0.65mm Wall Thickness, 6mm length
5mm Round faceted stones
1.5mm Beaded wire, 8cm length, silver
Hard silver solder
Cabochon Setting
Sterling Silver sheet - 0.5mm thick, large enough for your stone with a few mm spare
Fine Silver bezel wire - 3mm or 5mm high
Cabochon gemstone - round,
Hard silver solder
can stone setting be done in gold?
Yes, these same techniques can be used when working with gold. We recommend you practice your technique in silver first before moving onto working with gold.
Where can I buy jewellery supplies from?
To source your tools and materials, take a look at our list of worldwide jewellery suppliers https://www.jewellersacademy.com/jewellery-supplie...


